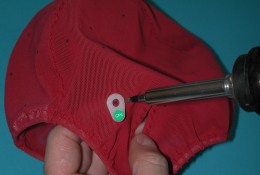
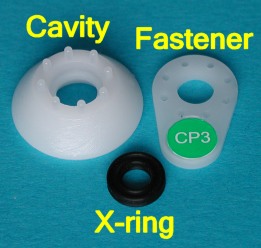
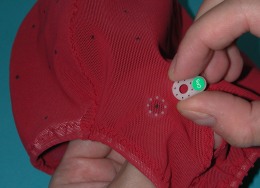
You
can choose whether BioSemi assembles your headcap or that you assemble
your headcap yourself. Some users prefer the last because it allows
them to install the electrode at exactly the spots relevant to their
application. The holders can always be relocated afterwards. Of
course, if you do this very often, more and more holes will eventually
force you to buy a new empty headcap. Headcap's are supplied with
a sticker labelsheet with 10/20 labeling or the BioSemi ABC labeling.
A
headcap with 64 electrode channels consists of:
66
x Gel-Cavities
66
x Fasteners
66
x X-rings
Note:
Each headcap needs 2 extra electrode holders for the "Common
Mode Sense" and the "Driven Right Leg" electrodes.
These 2 electrodes are not normal electrode channels, but
are needed for driving the subject towards the Voltage of
the AD-box and for suppressing the Common Mode induced by
for example main power equipment in the neighborhood of subject.
Insert
the X-ring in the Cavity
Place
the Cavity at the bottom, right in the middle of a dot.
Press
and Rotate your thumb over the headcap in order to press the
8 pins of the Cavity through the cap.
Check
if the dot is still in the middle of the headcap
Press
the Fastener FIRMLY on the Cavity
Use
a solder iron at 300 degrees Celsius for making a hole in
the headcap. The best way is to press the solder iron all
the way down quick and also pull it out again quick. The X-ring
will not be melted quickly as long as it will not touch
the solder iron longer than 3 seconds.